Posts

Showing posts from 2009

Startup error with Thunderbird 3.0

Updated to Thunderbird 3.0 released a month back from its beta version with lightning installed but was greeted with a 2 error messages. On starting the client. Error dialog: An error was encountered preparing the calendar located at moz-profile-calendar:// for use. It will not be available. The issue was locked under bugzilla at redhat, to be a schema issue with the database used for the calender which was to be updated. So finally followed the steps and the issue was solved, and the calender was back in action. 1. Closed Thunderbird. 2. Switched to the profile directory of thunderbird. # /home/sawrub/.thunderbird/*********.default 3. Located the directory holding the calender data. ll calendar-data/ 4. There was the local.sqlite file which actually is a SQLite database. 5. Enter the sqlite console, by executing the command an dwas greeted with the corresponding prompt as. [sawrub@mybox calendar-data]$ sqlite3 local.sqlite SQLite version 3.6.12 Enter ".help"

Dock the Appications

Image
The day can be called successful one again as found a application that works with any kind of window managers having being tested with Gnome, KDE, XFCE as mentioned by the developer/s. So considered to give a try. 1. Installation was quick as its just a 95k package. # yum install -y kdocker.i586 2. Using it to Dock. The Docker application was found under Applications > Accessories > KDocker. Selecting the Docker turned my pointer into a kind of stock gun target. Decided to dock thunderbird, hence clicked the mouse on the application window, and it was done. 3. The icon looked a little bad but considering the work done can be acceptable.Here is the screen shot of how the docked thunderbird looked like. 4. Once docked the application can be undocked  by a single click on the docked icon of the application. 5. As seen in the above screen shot there is a terminal also docked along with the thunderbird. Great thanks to the development team.A small info about the appl

Bash Scripting Cookies

- Passing arguments to a Bash script. `basename $0` in the script will list the name of the script without the path. `dirname $0` in the script will list the absolute path of the script without the name. `$0` will list the full path 'URI' of the script. `$#` will list the count of the arguments passed to the script. `$*` will be listing all the arguments passed to the script. `$1` will be listing the first argument passed to the script. - If conditional statements Condition Meaning [ -a FILE ] True if FILE exists. [ -b FILE ] True if FILE exists and is a block-special file. [ -c FILE ] True if FILE exists and is a character-special file. [ -d FILE ] True if FILE exists and is a directory. [ -e FILE ] True if FILE exists. [ -f FILE ] True if FILE exists and is a regular file. [ -g FILE ] True if FILE exists and its SGID bit is set. [ -h FILE ] True if FILE exists and is a symbolic link. [ -k FILE ] True if FILE exists and its sticky bit is s

Script to take backup of Mails

The script was written to take the backup of the mails on weekly bases using cron. The script use to kill Thunderbird in my case and then start taking the backup so that no new mail comes in while the backup is in progress, a kind of cold backup. #Script to take backup of Mails #!/bin/bash PID=`pidof thunderbird-bin` LOC="/home/sawrub/.thunderbird/8vqt6zno.default/Mail/" DAY=`date +%F` REPORT="/tmp/Mail_REPORT" echo -e "`date`: Starting Mail Backup" > ${REPORT} echo -e "`date`: Going to Kill Thunderbird, PID : ${PID}" >> ${REPORT} kill -9 $PID >> /dev/null echo -e "`date`: Thunderbird Killed Successfuly" >> ${REPORT} cd $LOC FILE="Mail_${DAY}.tar.bz2" echo -e "`date`: Backup Starts at `date +%R`" >> ${REPORT} echo -e "`date`: The backup will be saved as ${FILE}" >> ${REPORT} tar -cjpf /data/mails_backup/${FILE} * su - sawrub -c thunderbird echo -e "`d

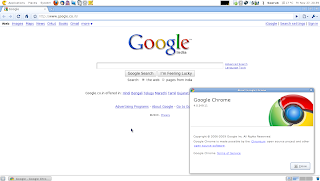
Google released Beta version of Chrome for Linux

Image
Google is out with its 'Beta' build of its browser for Linux , in just couple of weeks after the unstable build was made live for public. The Beta version of the browser like its Windows build is fast , secure , stable , simple , extensible , and embraces open standards like HTML5 . All of the user who have installed the unstable version will have to un-install the older unstable version and then install the new 'BETA' version available under the Linux repository from Google as mentioned in the earlier post. The process of installation is just the same, with minor changes. 1. Search for the available packages for Google Chrome [root@mybox ~]# yum search chrome Look in the search results for packages by name 'google-chrome', packages similar to following will be listed. google-chrome-beta.i386 : Google Chrome google-chrome-unstable.i386 : Google Chrome 3. Check if the unstable version is installed. [root@mybox ~]# yum list installed |grep google-chrome

Google Public DNS.....step towards dictatorship

Google Public DNS is a free, global Domain Name System (DNS) resolution service, that you can use as an alternative to your current DNS provider. To try it out: Configure your network settings to use the IP addresses 8.8.8.8 and 8.8.4.4 as your DNS servers or Read our configuration instructions . If you decide to try Google Public DNS, your client programs will perform all DNS lookups using Google Public DNS. Source :http://code.google.com/speed/public-dns/ Try out OPEN DNS  [http://www.opendns.com/] http://blog.opendns.com/2009/12/03/opendns-google-dns/

The Gift from Traffic

Image

Today was the ....

Here is the latest a fully off topic thing....My farewell mail sent to the people i worked/ interacted at XXXXXX India [Mail] From : Saurabh Sharma Reply-to : sawrub@yahoo.co.in To : Bcc : Subject : Today was the .... Date : Fri, 04 Dec 2009 15:30:38 +0530 Hi All, By god's grace, your well wishes and efforts from my side, finally the day has come when I can subject a mail like this, and be in a situation to bid you all a special bye. And this is how I'll like to orate out the whole thing. - Today was the last morning when I had to get up early at 5:30 AM get ready and then run past the stray dogs barking at me for disturbing them at that hour, and also fearing a call from office that the cab has left from the pick-up point, though i had been a victim of the same a couple of times. - Today was the last morning when I was supposed to log-in to my Linux box and do some maths for getting the sum up at 8+ Hrs for the activities done yesterday and then stamp the same

Google Chrome released for Linux [Unstable]

Image
The Google Chrome Browser is finally out for the Linux distributions.Presently Google have marked it as unstable. Process of installing chrome on the Fedora 11 box went as below : 1. As root, added a file called google.repo in /etc/yum.repos.d/ for a new repository information. [google] name=Google - i386 baseurl=http://dl.google.com/linux/rpm/stable/i386 enabled=1 gpgcheck=1 gpgkey=https://dl-ssl.google.com/linux/linux_signing_key.pub 2. Searched for chrome in the available repositories. [root@mybox yum.repos.d]# yum search chrome Loaded plugins: presto, refresh-packagekit =========================================================================== Matched: chrome =========================================================================== links.i586 : Web browser running in both graphics and text mode bleachbit.noarch : Remove unnecessary files, free space, and maintain privacy google-chrome-unstable.i386 : Google Chrome qfaxreader.i586 : A multipage monochrome/color

Getting website Offline though CLI

Mirroring a site was never that easy. No software required just a single line command all is done.Let me explain how i did that. 1. Found a site had good AWK manual. 2. Went through the AWK manual and located two good options to the command that worked just well, though i had few wrong attempts earlier. - m : Mirrors the web site [man] Turn on options suitable for mirroring. This option turns on recursion and time-stamping, sets infinite recursion depth and keeps FTP directory listings. It is currently equivalent to -r -N -l inf --no-remove-listing.[/man] -k : Makes the local copy of site browsable, by making all of the links relative to the local location. [man]After the download is complete, convert the links in the document to make them suitable for local viewing. This affects not only the visible hyperlinks, but any part of the document that links to external content, such as embedded images, links to style sheets, hyperlinks to non-HTML content, etc.[/man] -w : Introduces

Celebrating 5yrs of Firefox [9 Nov, 2009]

Image

Securing machine from any kind of SSH access

Try to locate the that whether you machine is set to accept all SSH connections under the IPTABLES rules. # iptables -L INPUT --line-numbers|grep ssh [will list all the rules applied to the incoming traffic over SSH] Try to locate the following entry [if it exists in the list shown] ACCEPT tcp -- anywhere anywhere state NEW tcp dpt:ssh remove the entry as its defined to accept all the incoming traffic over SSH,and this is how to. Just pick the row number of the entry [the first column,say its 4th],and then list it using # iptables -L INPUT 4 and then delete it using # iptables -D INPUT 4 Now to stop SSH to your machine,just fire the following command. # iptables -A INPUT -p UDP --dport 22 -j REJECT # iptables -A INPUT -p TCP --dport 22 -j REJECT Save the rules. # service iptables save Restart the service # service iptables restart All this could also have been done by just shutting down the SSH service,but the idea was to try hands at IPTABLES

SAWRUB behind the BARS

Image
Want one for yourself click

CLI Utils

- List contents of tar.bz2 # tar -jtvf etc.tar.bz2 |less - Extract Single file from within tar.bz2 [path specified] # tar -jxvf etc.tar.bz2 etc/yum.conf - Extract Single file from within tar.bz2 [w/o path specified] # tar -jxvf etc.tar.bz2 --no-anchored yum.conf - Adding a panel item to run as different user . Assume that we want to run a terminal for a user who is not logged in X envt. Adding the following line to the Command section of the new launcher and selecting run in terminal, will open a new terminal window with that user. # su - username Also can add ssh option to the command # su - username -c "ssh remoteserver" - Rebuilding RPM database indices from the installed package headers. # rpm --rebuilddb If rebuilding the database gives errors,which means the DB is corrupted,in that case we need to delete the DB [a Berkeley DB] and recreate it once the bad one is gone. - Deleting the RPM Database . # cd /var/lib/rpm Locate the DB files in there. #

Address book configuration [LDAP] on Evolution

Select new address book creation using LDAP from the Contacts tab. General Tab - Name : My LDAP [Any Name] Server : Port : 389 Encryption : No Encryption Login method : Using DN Login : Details tab - DC=xxxx,DC=xxxx,DC=xxxx [This can be searched by evolution search button over there] Search scope : Sub Search Filter :(objectclass=*) Edit > Prefs > Auto-completion - Select check box for : Always show addressses of the autocompleted contact Enable the check box for LDAP server [with the name defined at the time of creation as 'My LDAP' under general tab].

Yum Utils

1] Check the available packages for update # yum check-update 2] Exclude a package from getting updated Exclusion can be done in 2 ways i] Runtime # yum check-update --exclude package-name e.g. # yum check-update --exclude firefox or using a wild card, by which all the packages starting with this name will be excluded from update. # yum check-update --exclude openoffice* ii] Defining in configuration # vi /etc/yum.conf append the following line in there exclude= package1 package2 package3 we can also use wild card here as above. Will be updating the same from time to time...

VPN Setup using PPTP

Image
Configuring the VPN connection to my office n/w : Steps : 1] Install pptp and NetworkManager-pptp , using yum. # yum install pptp NetworkManager-pptp 2] Once the installation is done,the next step is to configure the VPN connection using the above mentioned installed packages.For that we need to do setting under Network Manager Applet.It can be accessed by clicking the network icon in the notification area. 3] Right click the Network Manager Applet. Select Edit Connections > VPN tab > Add. 4] Select Point-to-point Tunnelling Protocol over there from the drop-down if its not there by default. 5] In the new connection set-up window. - Give a name to the new connection [optional,but recommended]. - Select the Connect Automatically check-box. - Define the : Gateway | User name | Password You can even verify the entered password by clicking 'Show Password'. - All is done now, just click Apply . 6] Restart the machine. 7] Connecting to VPN Server . - Left

XZ takes over Gzip in RPM

As per the Fedora 12 Feature List , RPM packages will be compressed with xz instead of gzip, making the iso reduce by 30% in size, and 15% smaller compared to the bzip2 compression which is also an option, though bzip2 adds greater compression, but all this goes at the cost of large memory and cpu time. XZ on the other hand allows better compression without any of these.Thanks to Tukaani , the developer channel [presently one man army] behind the making of XZ Utils. The core of the XZ Utils compression code is based on LZMA SDK, which is still in rapid development and hence Fedora will just using XZ instead of the not-finalized LZMA. XZ Utils consist of several components: - liblzma is a compression library with API similar to that of zlib. - xz is a command line tool with syntax similar to that of gzip. - xzdec is a decompression-only tool smaller than the full-featured xz tool. - A set of shell scripts (xzgrep, xzdiff, etc.) have been adapted from gzip to ease viewing, greppi

Making of Google Chrome

Image
Funny way of bringing in all the colours of the Windows in a browser. The real story goes like this : Making of Google Chrome

Disabling IPv6 lookup for the time being

Just had a chance to open up my hosts file under F11,and saw an entry that got my attention it was the second row as shown below. [root@sawrub-xbox ~]# cat /etc/hosts 127.0.0.1 localhost localhost.localdomain localhost4 localhost4.localdomain4 ::1 localhost localhost.localdomain localhost6 localhost6.localdomain6 [root@sawrub-xbox ~]# Moving around the web get me to the conclusion that its related to the IPv6 . The IPv6 site also shouted out at me ,with my IPv4 IP Address. Thinking over it, questions came up to the every answer that i was getting, let me collect all question together first and make the answers follow them: Q1] If my machine is still IPv4, why was the entry of IPv6 over there under /etc/hosts . Q2] Why is this enabled by default. Q3] How do i control IPv6 fetch from my applications. Q4] How do I disable IPv6 at my machine. Q5] How do i get IPv6 address. The answers are here. A1] Kernel 2.2+ come with IPv6 built in. A2] Ipv4 is now ~30 Y

Reading a txt file in a Zip

A problem came up...to read a text file without extracting the file from the zip file. So it was like this how i went by it: 1] Zip file was present in my home dir by the name 'archive.zip',so listing the file in home directory was done by. [sawrubt@sawrub ~]# [sawrub@sawrub ~]# ll archive.zip -- output deprecated -- [sawrub@sawrub ~]# 2] List the files present in that archive. [sawrub@sawrub ~]# unzip -l archive.zip|tail -- output deprecated -- 9999770 09-02-09 12:09 00010b32.jdb 9999963 09-02-09 12:09 00010b33.jdb 6371421 09-11-09 11:36 00010b34.jdb 71 09-11-09 11:49 version.txt -------- ------- 628281884 504 files [sawrub@sawrub ~]# 3] And now my task was I had to read version.txt, so went by firing in the command [sawrub@sawrub ~]# unzip -p archive.zip version.txt -- output deprecated -- [sawrub@sawrub ~]# and all was done. Definition of '-p' option per unix manual: -p extract files to pipe

Preventing Inactive SSH Snapping

Sometimes we face issues like very frequent connection breaks in the ideal SSH sessions,and its mostly because of "a packet filter or NAT device timing out your TCP connection due to inactivity." http://www.openssh.com/faq.html#2.12 So here is the work around for the same. Linux : 1] Open following file /etc/ssh/ssh_config (as Root user). 2] Append the following line in there at the bottom. 3] ServerAliveInterval 60 4] Save the file. 5] Restart the sshd daemon. 6] The line entered have the following definition. ServerAliveInterval Sets a timeout interval in seconds after which if no data has been received from the server, ssh will send a message through the encrypted channel to request a response from the server. The default is 0, indicating that these messages will not be sent to the server. This option applies to protocol version 2 only. Source :man page of ssh_config [man 5 ssh_config] Windows [Putty] : 1] Open Putty.

SSH : Secure Shell

Using SSH [Secured SHell] is a very good mechanism to work on a remote system with full secured communication between client and server as the communicate is under SSL and no one sitting over the wire can read the encrypted data being transferred. SSH came up as a replacement to the old unsecured protocols like ftp,telnet. What all makes difference : - Security OpenSSH supports 3DES, Blowfish, AES and arcfour as encryption algorithms. These are patent free.Encryption is started before authentication, and no passwords or other information is transmitted in the clear. Encryption is also used to protect against spoofed packets. - Compression Requests compression of all data (including stdin, stdout, stderr, and data for forwarded X11 and TCP connections).The compression algorithm is the same used by gzipCompression is desirable on modem lines and other slow connections, but will only slow down things on fast networks. - Key based authentication [RSA / DSA] Strong authentication protects

Backdoor entry as Root

The login into Run level 1,is by default the the ROOT login that is granted to the user,even without any password.Any unauthorised person can boot the system in RL 1 and just gain control of your system. But don't take this as a hole,the security is just one file and couple of clicks away.All is needed is editing 'inittab' file present under /etc .And add a special line in there. In steps it will be : 1. Be the root user. 2. Open the file in vi editor vi /etc/inittab 3. Enter the 'Insert' mode,by pressing Insert button. 4. Append the line at last of the file su:S:wait:/sbin/sulogin 5. Save the file and exit. The back-door is now secured by the root password.

Fedora DVD == Yum Repository

Last night i corrupted out my Xorg ,and was left in the 'Black World' of run-level 3. While trying to re-install it through YUM the N/W went out [all bad against me]. So had no other option than to install the xorg server though the Fedora DVD that i had. Trying my hands to configure the DVD as the source for YUM was a great experience ,though it was much simple task. Better to go step by step[Everything as a super user] : 1. All of the repositories configuration files under /etc/yum.repos.d/ were backed up and placed under a new directory created /etc/yum.repos.d/back-up/ #mv /etc/yum.repos.d/* /etc/yum.repos.d/back-up/ 2. A new file 'dvd.repo' was created under /etc/yum.repos.d/ that will act as the configuration file for the new repository to be created with source as the Fedora DVD. 3. The file 'dvd.repo' was opened up in vi editor and following lines were added in there [dvd] name=DVD baseurl=file:/media/ enabled=1 gpgcheck=0 and the file was saved. PS

Chrome @ Fedora

Image
Installing Chromium on Fedora isn't really all that much harder than it is on a Debian-based system. But with Fedora you have a couple of different options. You can either install from command line or you can install using the yum package management too. The benefit of installing via yum is that you will be able to update Either way the installation is simple. Let's take a look at the Yum. You have to follow the following steps: Open your vi editor and enter the gain 'root' access. Create the '/etc/yum.repos.d/chromium.repo' file. Add the following contents to the file: [chromium] name=Chromium Test Packages baseurl=http://spot.fedorapeople.org/chromium/F11/ enabled=1 gpgcheck=0 Save the file. Update the yum database using : 'yum update' Finally fire the install : 'yum install chromium -y' Doing this all will install Chromium on your fedora 11 system.Which can be accessed from under Applications -> Internet -> Chromium Web Browser The

Some of the good links found over the net

- Gedit Plugins - Mirroring Fedora - Official Mirrors for North India - Online Distro Store - Third Party Plug-ins for Pidgin - An open source VoIP and video conferencing application for Gnome - Plug-ins for Evolution,mail client for Gnome - Linux installation:No CD,DVD,USB drive,N/W needed - The Open Web Foundation - cynin - Google Wave - Elgg - GnomeShell - Software forge for Free Software - Creative Commons India - Secure system from SSH Attacks - Add Python / C++ Auto-complete Support - Scripts for Nautilus - Ubuntu 9.10 with netbooks The list is increasing day by day.....so do come back to find new ones, and if you want to be good enough, please add a comment for one that you think is missing here,which may be i have not knocked at yet...

Clearing Cache

The Centos machine was just running out of memory and me running out of accessibility to it.And thanks to the system monitor applet that was going whole green [resembling RED here and telling me to stop]. And then only i googled for ,some way to reduce it back to normal.And found many for it,but only few with explanation for the script that was to be run. So finally after reading all that finally went by using echo 3 > /proc/sys/vm/drop_caches All game is in passing the variable to the file 'drop_caches'

Error while Expunging folder

Just started experimenting with Evolution and the 'Trash' was not able to empty itself when asked to 'Empty Trash'.And an error similar to following occurred,for the folder 'bad-folder ' that was created by mistake and was added to trash. ------------------------------------------------------------------------------------------------------------------------------------------------------------- Error storing `~/.evolution/mail/local/bad-folder (mbox)': Summary and folder mismatch, even after a sync ------------------------------------------------------------------------------------------------------------------------------------------------------------- Tried a lot and finally after goggling a lot finally got an idea to try out deleting the entry for the folder 'bad-folder' from the Evolution profile itself. So first listed all of the entries for it in the profile directory. [ssharma@l_ssharma ~]$ ll ~/.evolution/mail/local/z-bad* -rw-rw-r-- 1 ssharma

Brasero : CD / DVD Burning Application

Brasero is a revolutionary application to burn CD/DVD for the Gnome users. It's simple to use and have some unique features to enable users to create their discs easily and quickly. Few of the good features - Supports multi session - CD/DVD image creation and dumping to hard drive. - Check for file integrity. - Edition of silences between tracks in Audio CD's - Erase CD/DVD - Can save/load projects - A customisable GUI - Drag and Drop / Cut'n'Paste from nautilus. Fore more info: http://projects.gnome.org/brasero/

Cron and Crontab commands

The cron command starts a process that schedules command execution at specified dates and times. crontab - maintain crontab files for individual users.Similar to other commands this to have options . -u It specifies the name of the user whose crontab is to be tweaked. -l The current crontab will be displayed on standard output. -r The current crontab will be be removed. -e This option is used to edit the current crontab using the editor specified by the VISUAL or EDITOR environment variables. Usage : #crontab -u [user_name] - e An entry under crontab for user specified by the user_name will be made and saved automatically on exiting the editor. #crontab -u [user_name] - l Shows the cron jobs for the user specified. The cron jobs deceleration needs to be done in a 5 column format consisting of minute (0-59) hour (0-23) day of the month (1-31) month of the year (1-12) day of the week (0-6 with 0=Sunday) Taking the example that if the 'root' user desires to setup

Shorthand at the Linux CLI

Some of the very useful shortcuts of the CLI are / :- root directory ./ :- current directory ./command_name :- run a command in the current directory when the current directory is not on the path ../ :- parent directory ~ :- home directory $ :- typical prompt when logged in as ordinary user # :- typical prompt when logged in as root or superuser ! :- repeat specified command !! :- repeat previous command ^^ :- repeat previous command with substitution & :- run a program in background mode [Tab][Tab] :- prints a list of all available commands. This is just an example of autocomplete with no restriction on the first letter. x[Tab][Tab] :- prints a list of all available completions for a command, where the beginning is ``x'' [Alt][Ctrl][F1] :- switch to the first virtual text console [Alt][Ctrl][Fn] :- switch to the nth virtual text console. Typically, there are six on a Linux PC system. [Alt][Ctrl][F7] :- switch to the first GUI console, if there is one running. If the graph

Adobe Flash Plugin

All of the following steps should be done as ROOT user in terminal. 1] Download the package for yum repository configuration on your machine,using wget http://linuxdownload.adobe.com/adobe-release/adobe-release-i386-1.0-1.noarch.rpm You can get the lates one from here 2] Once the download is complete,run command # rpm -ivh adobe-release-i386-1.0-1.noarch.rpm 3] Now your box is configured to use flash plufuns available from ADOBE 4] To install flash ,just type in # yum install flash-plugin -y 5] Restart Firefox. 6] Verify that flash have installed close the browser instances and reopen them and browse the following link .

Root Login Not Possible

Few wrong settings that can prevent the 'Root' user to login to the linux box are 1) The Shell Check for the login shell that the system is offering to the 'Root' user. Steps for checking this i) Log in to the system in a single user mode. Help ii) Check for login shell under the /etc/passwd using following # grep root /etc/passwd in the results look for the line starting with 'root' check for the last entry considering ':' as a delimiter. iii) If the entry is '/sbin/nologin' that means the root user is not being provided a shell that enables a user to login to the system and perform tasks.We need to change this shell to /bin/bash so that user is allowed to login. iv) To change this we need to fire a single command. # usermod -s /bin/bash root this command will change the shell for the root user to /bin/bash as desired. v) The new shell can be cross checked by running the command used previously in step ii. # grep root /etc/passwd this time the l

single user mode

Steps for entering the single user mode. i) Reboot the machine,at GRUB [Boot Loader] there will be the listing of the Kernel selection. ii) Select the version of the kernel that you wish to boot and type e for edit. A list of items in the configuration file for the Kernel you just selected will show up. iii) Select the line that starts with kernel and type e to edit the line. iv) At the end of this line, giving the Space type-in 1 . Press [Enter] to exit edit mode. v) Once back at the GRUB screen, type b to boot into single user mode.

Changing Panel Color Scheme

After a lot of fight to locate the a simple hack to change the panel colour scheme,instead of installing another application for this, finally got the answer as a '.gtkrc-2.0' file with colour definitions for panel. All needed is to create a simple file with name as .gtkrc-2.0, the definition fg[NORMAL] = "#ffffff" defines the foreground colour [Font Colour] to be white [#ffffff].This value can be set to any value per your needs.A list of hex values for different colours are available at http://www.free-webmaster-tools.com/colorpicker.htm. Steps to create this file, and change the colour . Per this example font colour will be changed. 1. Go to your home directory,using the terminal. [ cd ~ ] 2. vi .gtkrc-2.0 3. Go to the Insert mode of vi editor by pressing in INSERT key, 4. -- INSERT --,should appear at the bottom left corner of the terminal screen. 5. Copy the mentioned contents and paste in the file. 6. Press Esc. key followed by [:wq] to save the changes made to

VLC Segmentation Fault

A yet another day for me after updating on my FC9 over the night and finding VLC media player to have stopped its daily task of playing tracks for me. The UI just stopped showing up,it used to come up for a flash and then go off.So what now the digging starts off along with Googling side by side. A bit later running 'vlc' at shell gave me the cause of the problem.There was a 'Segmentation fault' coming up. A lot Googling finally landed me to #videolan IRC chat at irc.vediolan.org.And over here i finally got my problem resolved. Though the guy over there who helped out did not mentioned the error cause in particular,but from the chat it seems to be due to the skin2 interface that I was using. I was asked to : 1. delete '~/.config/vlc/*' as a normal user. [rm -rf ~/.config/vlc/*] 2. Re- run 'vlc' at prompt 3. A pop up saying of 'privacy and network warning' came up which was normal per him.So acknowledged it with default settings. 4. The VLC was t